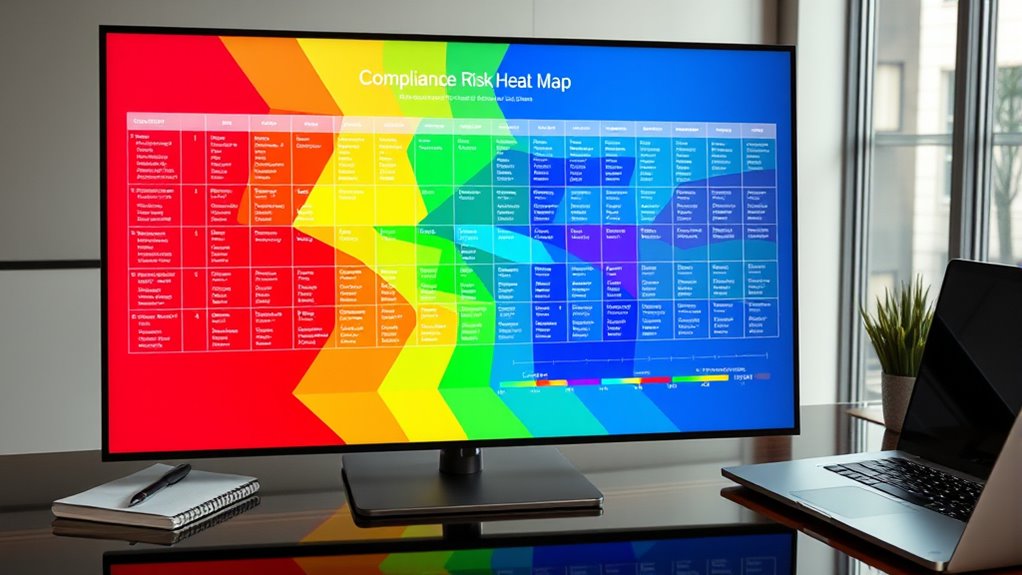

I’ve found that the best compliance risk heat map templates combine clear visual design, customization options, and easy integration with existing systems. They help prioritize hazards, track regulatory adherence, and streamline risk assessments efficiently. These templates also support trend analysis and real-time updates, making risk management more effective. If you want to discover the top options that fit your needs and simplify your compliance processes, keep exploring further insights on this topic.
Key Takeaways
- They offer customizable color schemes and risk thresholds for tailored compliance risk analysis.
- High contrast visuals ensure clear risk differentiation and quick decision-making.
- Compatibility with Excel, CSV, and databases allows seamless data integration.
- User-friendly interfaces simplify navigation and reduce learning curves for teams.
- Advanced features like trend analysis and real-time updates enhance ongoing risk management.
Tags 4 Less Hotwork Permit Maintenance Tags
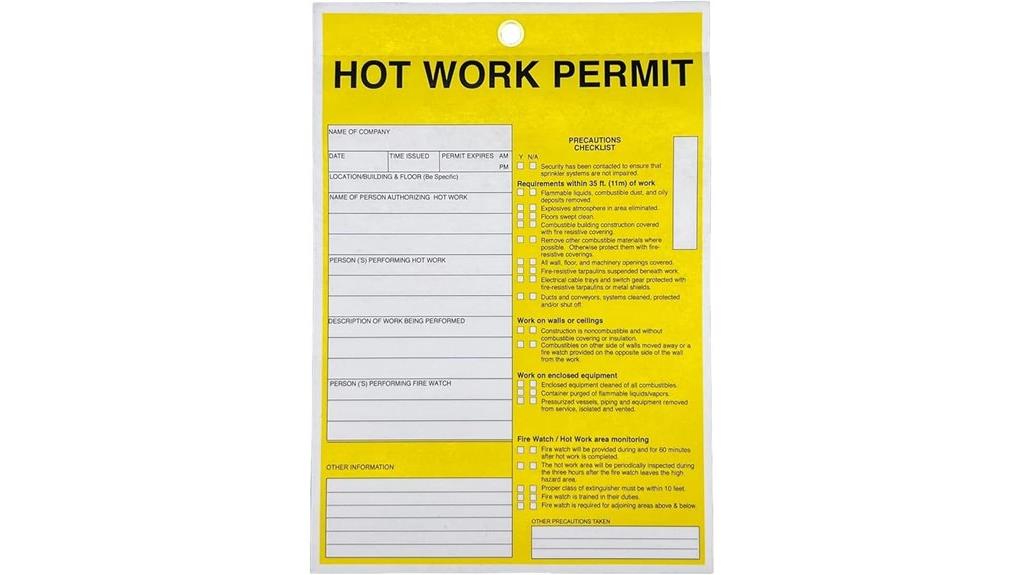
If you’re looking for a reliable way to guarantee safety during hot work operations, Tags 4 Less Hotwork Permit Maintenance Tags are an excellent choice. These tags clearly communicate crucial safety info like company name, date, time, and safety checklists, making it easy to monitor ongoing heat or spark activities. Made from durable carbonless bond paper with reinforced holes and a brass eyelet, they withstand tough industrial environments. Designed in the USA, each pack includes 25 OSHA-compliant tags that help ensure safety compliance and proper record-keeping. Their visibility and reliability support safer work sites and better safety practices during hot work tasks.
Best For: industries and safety personnel seeking durable, OSHA-compliant tags to ensure safety during hot work operations.
Pros:
- High visibility with bright yellow design and reinforced holes for durability.
- Facilitates clear communication of critical safety information like date, time, and safety checklists.
- Made from durable carbonless bond paper with secure brass eyelet for reliable attachment.
Cons:
- Limited to 25 tags per pack, which may require reordering for large-scale projects.
- Designed primarily for industrial use, possibly less suitable for non-professional environments.
- Slightly heavier compared to lighter tag options, which may affect ease of handling in some situations.
10 Tips To Beat The Heat Wall Sign
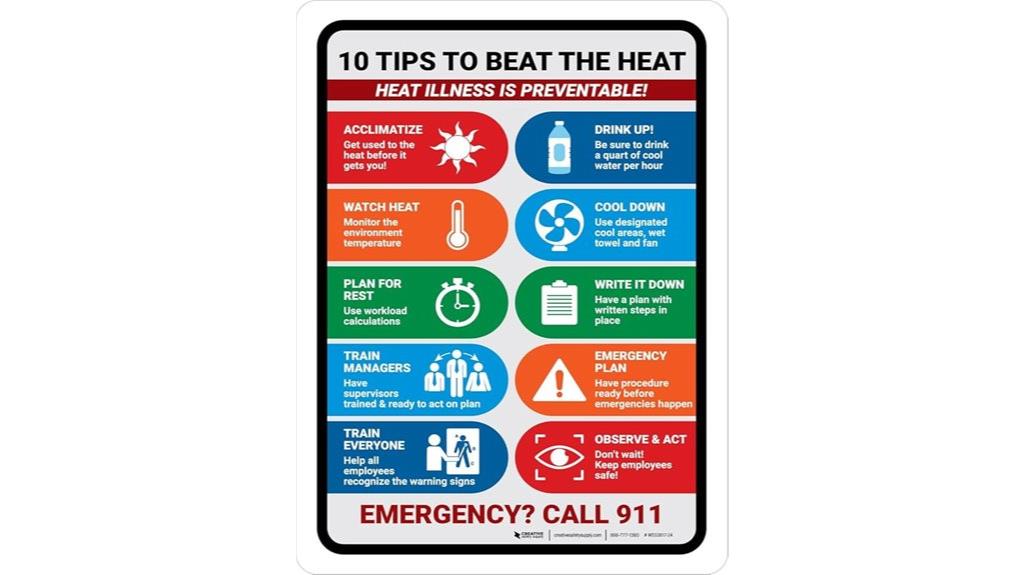
The “10 Tips To Beat The Heat Wall Sign” is designed for safety managers and facility staff who need a clear, durable reminder to promote heat safety in high-traffic or demanding environments. Its compact 10 x 7-inch size and industrial-grade plastic construction make it highly visible and long-lasting. The peel-and-stick design allows quick installation on doors, windows, or walls, ensuring the safety tips are always accessible. Ideal for industrial, scientific, or high-demand settings, this sign effectively communicates essential heat safety practices, helping prevent heat-related incidents and keeping everyone informed and protected.
Best For: safety managers and facility staff needing a durable, clear reminder to promote heat safety in industrial or high-traffic environments.
Pros:
- Highly visible with a clear, pre-printed message and character illustration for quick comprehension
- Durable industrial-grade plastic construction ensures long-term use in demanding settings
- Easy to install with peel-and-stick feature, suitable for doors, windows, and walls
Cons:
- Limited to indoor use; not designed for outdoor weather resistance
- The size (10 x 7 inches) may be too small for very large or open spaces requiring more prominent signage
- Fixed message; lacks customization options for specific safety tips or language preferences
5Forms 237 Estimate Sheets 8 1/2 x 14 Qty 250
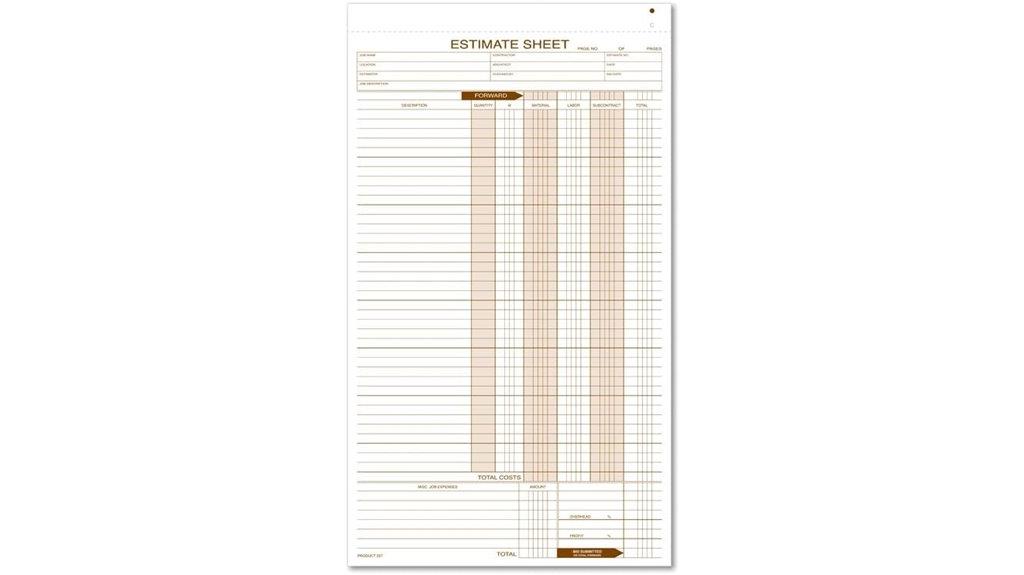
For professionals who need reliable estimate sheets that protect against unreasonable claims, the Forms 237 Estimate Sheets in 8 1/2 x 14 inches provide a practical solution. These sheets come in a pack of 250, feature wire stitching, and are printed on ivory stock with brown ink. They offer space to list labor, materials, and miscellaneous expenses, with extra lines on the back for detailed recording. Designed by NEBS, they help guarantee accurate estimates and reduce disputes, making them ideal for those who want organized, professional documentation. Their durability and thoughtful layout support effective cost management and risk mitigation.
Best For: professionals and contractors seeking reliable, organized estimate sheets to accurately document costs and protect against disputes.
Pros:
- Durable wire-stitched design on ivory stock for long-lasting use
- Ample space to detail labor, materials, and miscellaneous expenses
- Extra lines on the back for comprehensive record-keeping
Cons:
- Quantity of 250 sheets may be more than needed for small projects
- Price and availability may vary; not specified here
- Requires sign-in to report lower prices or submit feedback
Electrical Knowledge Chart Metal Tin Sign (8 x 12 Inch)
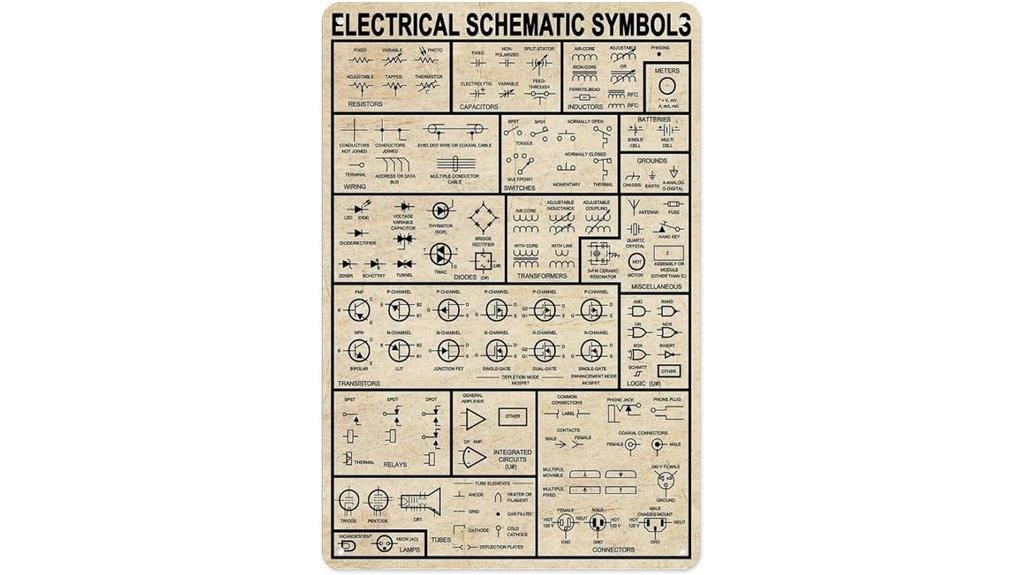
An ideal choice for electrical professionals and enthusiasts, the Electrical Knowledge Chart Metal Tin Sign (8 x 12 Inch) combines educational content with stylish decor. Made from lightweight, durable aluminum, it resists rust and corrosion, making it suitable for indoor or outdoor use. The sign features a modern design with schematic symbols and electrical knowledge, perfect for wall art, office decor, or shop signage. Its pre-drilled holes allow easy mounting, and at just 7 ounces, it’s unobtrusive yet impactful. This versatile piece adds both functionality and aesthetic appeal, making it an excellent addition to any workspace or personal collection.
Best For: electrical professionals, enthusiasts, and anyone seeking stylish educational decor for indoor or outdoor use.
Pros:
- Made from lightweight, durable aluminum resistant to rust and corrosion.
- Features a modern design with schematic symbols and electrical knowledge for educational or decorative purposes.
- Easy to mount with pre-drilled holes, suitable for various environments and settings.
Cons:
- May be limited in size for those seeking larger wall displays.
- Made in China, which might concern those preferring locally manufactured products.
- Price and availability may vary, requiring online or offline store comparison.
Pickett Military Map Symbols Template (1700I)
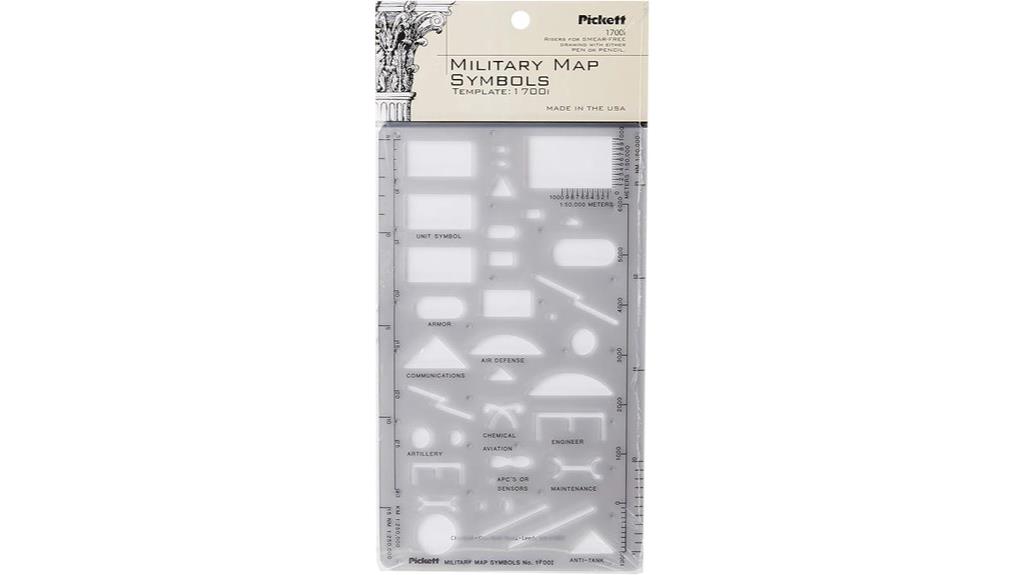
Pickett Military Map Symbols Template (1700I) stands out as an essential tool for military personnel and tactical map operators who need precise, smudge-resistant symbols. Its compact size easily fits into BDU trousers and flight crew checklists, making it perfect for field use. Crafted from durable plastic, it features built-in risers and smooth apertures to minimize smudging during drawing. With scales for 1:50,000 and 1:250,000 maps, it supports accurate marking and planning. Trusted by users, it offers reliable performance for training, battle staff, and map operations. This cost-effective, USA-made template enhances tactical efficiency and map clarity in demanding environments.
Best For: military personnel, tactical map operators, and training instructors needing precise, durable, and smudge-resistant map symbols for field operations and tactical planning.
Pros:
- Compact and portable, easily fits into BDU trousers and checklists for field use
- Made from durable plastic with built-in risers and smooth apertures to prevent smudging
- Supports accurate mapping at 1:50,000 and 1:250,000 scales, enhancing tactical precision
Cons:
- Slightly limited in size, which may require multiple templates for extensive mapping needs
- Some users have noted room for improved durability in heavy-duty environments
- Availability depends on online purchase, which may limit immediate access in remote locations
Crystal Pilot Aviation Acronyms Cheat Sheet and Medium VFR-METAR Cheat Sheet
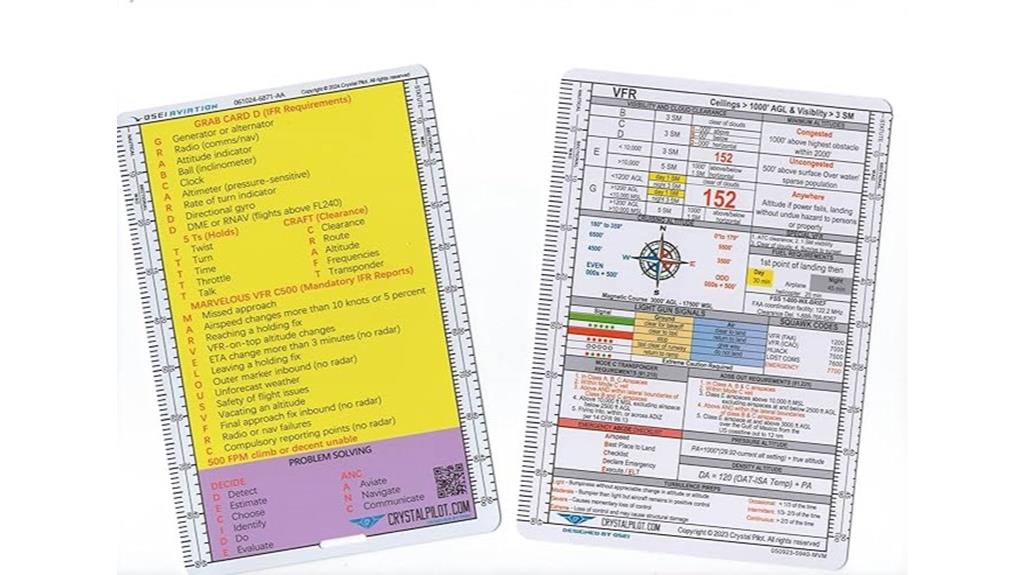
The Crystal Pilot Aviation Acronyms Cheat Sheet and Medium VFR-METAR Cheat Sheet are essential tools for pilots and flight students who need quick, reliable references in the cockpit. They feature compact, durable designs, perfect for on-the-go use and study sessions. The Acronyms Cheat Sheet covers 15 key acronyms like DECIDE, PAVE, and 5Ps, helping clarify complex aviation terminology. The VFR-METAR sheet simplifies weather interpretation with all METAR codes on the back, enabling swift weather assessment during flight planning. Trusted by professionals, these guides improve safety, knowledge, and exam readiness, making them invaluable resources for modern aviators.
Best For: pilots, flight students, and flight instructors seeking quick, reliable reference tools for cockpit use and study sessions.
Pros:
- Compact and durable design ideal for on-the-go use in the cockpit
- Contains essential acronyms and weather codes for quick reference and decision-making
- Trusted by professionals for accuracy, relevance, and ease of use
Cons:
- May require supplementary materials for in-depth understanding of complex topics
- Limited to essential information, not comprehensive guidebooks
- Might need periodic updates to stay current with evolving aviation standards
Aluminum Warning Eye Protection Welding Sign (9×12 Inches)
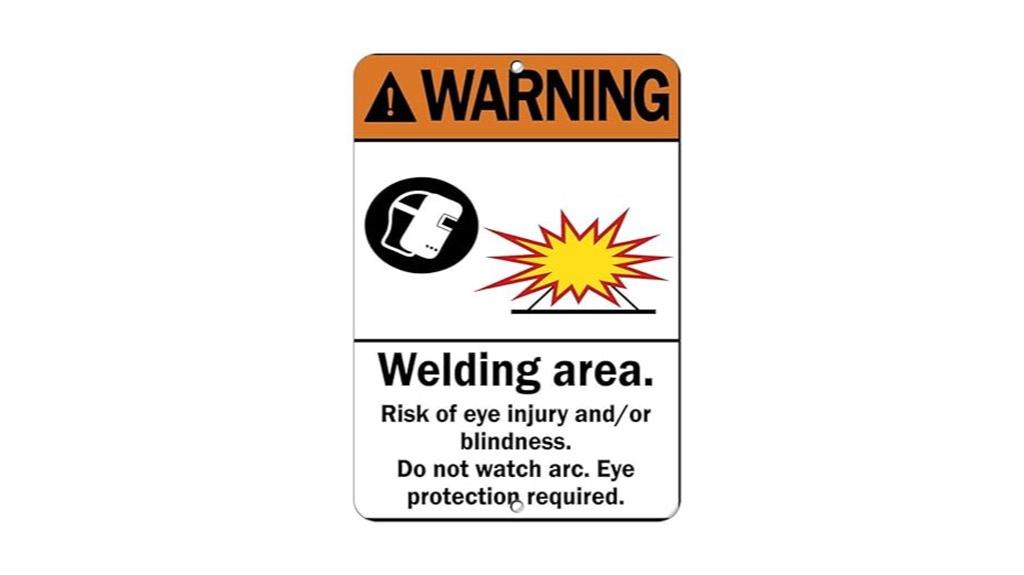
Looking for a durable and highly visible warning sign for welding areas? The Aluminum Warning Eye Protection Welding Sign (9×12 Inches) is perfect. Made from .040-inch high-quality aluminum, it’s built to last for decades, resisting UV, humidity, and water—ideal for indoor and outdoor use. The bold, easy-to-read lettering and clear graphics ensure visibility from a distance, emphasizing safety with messages like “Warning Eye Protection Required.” Its size fits most spaces, and pre-drilled holes make installation simple on walls, fences, or doors. This weatherproof sign effectively fosters safety compliance in harsh environments, making it an essential safety tool.
Best For: industrial workplaces, construction sites, and welding areas needing durable, highly visible safety signage to prevent eye injuries.
Pros:
- Made of high-quality, durable .040-inch aluminum for long-lasting use
- UV, humidity, and water resistant, suitable for outdoor environments
- Clear, bold lettering and graphics for maximum visibility from a distance
Cons:
- Pre-drilled holes require proper tools for installation (not included)
- Sign size (9×12 inches) may be too large for very tight spaces
- Aluminum material, while durable, may be more expensive than plastic alternatives
Sandbaggy ADA Warning Pads (ADA Compliant)
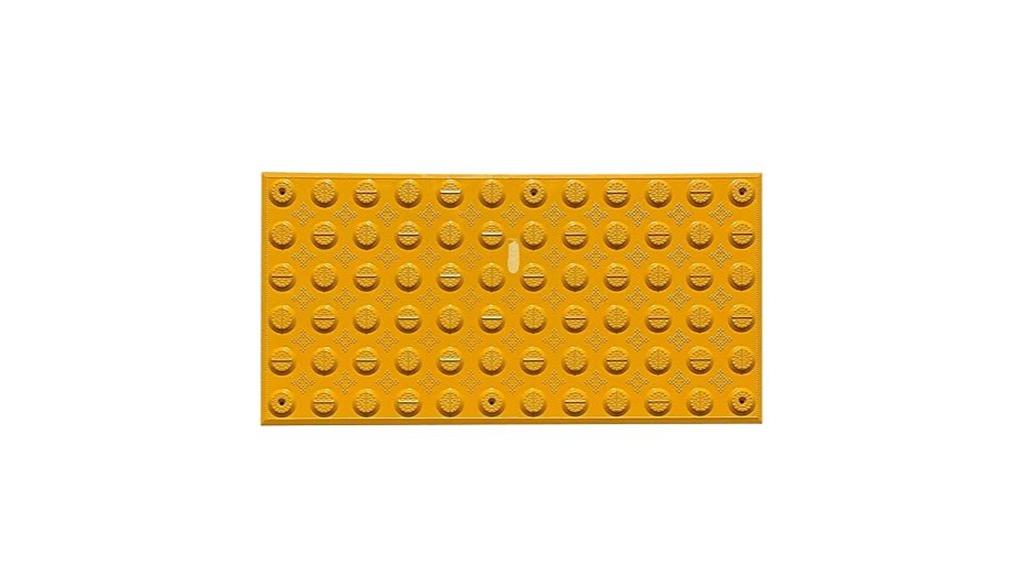
Sandbaggy ADA Warning Pads stand out for their precise compliance with ADA standards, making them an ideal choice for organizations prioritizing accessibility and safety. These truncated domes feature tactile warning surfaces designed for detectable warnings on walking surfaces, enhancing safety for all users. Their surface mount design with pre-formed fastener locations guarantees quick, error-free installation—no adhesives needed. Made from durable materials with high slip and impact resistance, they excel in high-traffic environments. Plus, their UV protection guarantees long-term outdoor performance. Overall, Sandbaggy ADA Warning Pads provide reliable, compliant safety solutions that meet regulatory requirements and improve accessibility.
Best For: organizations and facilities seeking ADA-compliant tactile warning surfaces to enhance accessibility and safety in high-traffic or outdoor environments.
Pros:
- Meets ADA standards for detectable warnings, ensuring regulatory compliance.
- Easy to install with pre-formed fastener locations, reducing installation errors.
- Made from durable, slip-resistant materials with UV protection for long-term outdoor use.
Cons:
- Does not include fasteners or adhesives; additional components are required for installation.
- Surface mount installation may require specific tools or expertise.
- Limited color options may restrict design flexibility.
Factors to Consider When Choosing a Compliance Risk Heat Map Template
When selecting a compliance risk heat map template, I focus on how well it meets my data compatibility needs and guarantees visual clarity. I also consider whether it offers enough customization options and a user-friendly interface to simplify the process. Additionally, I check if it supports advanced analytical features to provide deeper insights.
Data Compatibility Needs
Choosing a compatible heat map template starts with guaranteeing it can handle the data formats you currently use, like Excel, CSV, or database exports. Seamless integration is key, so verify that the template supports these formats to avoid tedious manual conversions. It’s also important to check compatibility with your existing data visualization tools or software platforms, which can save you time and effort. Consider whether the template can manage the volume and complexity of your data, especially if you work with multiple sources or real-time feeds. Additionally, look for customizable data fields to match your specific compliance metrics and risk factors. Finally, ensure the template supports data updates and version control, helping you maintain accuracy and consistency over time.
Visual Clarity Importance
Visual clarity is crucial because it guarantees that key information on a compliance risk heat map is quickly and easily understood. When the visual presentation is clear, risks stand out, and decision-makers can identify areas of concern without confusion. Using high contrast color schemes makes different risk levels more legible, speeding up assessments. Clear labels and readable fonts prevent misunderstandings and streamline communication across teams. Simplified visuals with minimal clutter enhance comprehension, especially under time pressure. Consistent symbols or color codes promote universal understanding, reducing errors. Overall, prioritizing visual clarity ensures that your heat map effectively communicates risks, enabling faster, more accurate decisions that support overall compliance and risk management efforts.
Customization Options Available
Selecting a compliance risk heat map template requires careful consideration of its customization options to guarantee it aligns with your organization’s specific needs. Many templates let you adjust color schemes to clearly highlight different risk levels, making analysis more intuitive. You can often tailor the size, labels, and data categories to match your unique compliance framework. Advanced options may include adding custom icons, symbols, or annotations that better represent your organization’s specific factors. Some templates also allow editing data fields and adjusting risk thresholds, ensuring your assessments stay current with evolving criteria. Compatibility with various software platforms is vital, as it enables you to modify layouts, designs, and data inputs for a personalized and effective risk management tool.
User Interface Simplicity
Have you ever struggled to interpret a complex heat map? A simple user interface makes all the difference. It reduces the learning curve, so you can quickly grasp key compliance risks without extensive training. Clear visual cues, like intuitive color coding and straightforward legends, help prevent confusion and make understanding effortless. A minimalistic design with intuitive navigation keeps your focus on critical issues instead of unnecessary clutter. Adding interactive features, such as tooltips and clickable elements, can boost usability for both beginners and seasoned professionals. Consistent layout and standardized symbols across templates also support clarity, enabling faster decision-making. Overall, prioritizing user interface simplicity guarantees your risk assessment process is efficient, accessible, and effective.
Analytical Features Support
When choosing a compliance risk heat map template, it’s vital to take into account the analytical features that support accurate and efficient risk assessment. Look for templates with color-coded risk levels, which make it easy to identify high and low risks at a glance. Trend analysis and predictive scoring can help anticipate future compliance issues, while data integration ensures real-time updates for a thorough view. Customizable metrics are essential for tailoring the heat map to specific regulatory or organizational needs. Advanced tools like statistical analysis, data filtering, and scenario modeling enhance evaluation accuracy. Additionally, visualization options such as interactive dashboards and drill-down reports facilitate interpreting complex data quickly and effectively. These features collectively improve decision-making and streamline risk management processes.
Industry Regulation Compliance
Choosing a compliance risk heat map template for industry regulation requires a clear understanding of the specific standards set by governing bodies like OSHA, EPA, or local authorities. It’s essential that the template incorporates relevant regulatory thresholds and standards to accurately identify areas of potential non-compliance. Regular updates are critical to reflect changes in regulations, ensuring ongoing adherence at all operational levels. The template should visually differentiate compliant from non-compliant zones, using clear indicators like color coding based on regulatory thresholds. Additionally, supporting documentation and audit trails within the template help verify compliance efforts and streamline reporting during inspections. By considering these factors, you guarantee your heat map remains an effective tool for maintaining regulatory compliance and managing risks efficiently.
Cost and Budget Fit
Selecting a compliance risk heat map template that fits your budget is vital to guarantee cost-effective risk management. I recommend comparing costs across different providers to make certain you get the best value without overspending. Consider whether the template offers scalable features or add-ons that provide extra value without exceeding your financial limits. It’s also important to evaluate if the pricing aligns with the complexity and detail needed for your risk assessments. Look for cost-effective options that include necessary customization features—this helps avoid additional expenses later on. Finally, remember to factor in the total cost of ownership, including licensing or subscription fees, to guarantee the investment remains sustainable over your planned usage period. Being mindful of these factors helps optimize your budget and maximize the template’s value.
Frequently Asked Questions
How Do Heat Maps Improve Compliance Risk Management?
Heat maps make compliance risk management clearer by visually highlighting areas of concern. I find they help me quickly identify high-risk zones, prioritize my efforts, and allocate resources more effectively. Instead of sifting through endless data, I see at a glance where risks are concentrated. This visual approach keeps me proactive, ensuring I address issues before they escalate, ultimately strengthening my organization’s compliance posture.
Can Templates Be Customized for Different Industries?
Absolutely, templates can be customized for different industries. I often tailor heat maps to reflect specific industry risks, regulatory requirements, and operational nuances. By adjusting categories, color codes, and data points, I guarantee the map accurately highlights the unique compliance challenges my organization faces. Customization makes these tools more relevant and effective, helping us proactively manage risks tailored to our industry’s particular landscape.
What Features Should I Look for in a Heat Map Template?
Ever wondered what makes a good heat map template? Look for clear visual indicators like color-coding, customizable categories, and easy-to-understand legends. I prioritize templates that allow for real-time updates and easy data integration. They should also be flexible enough to adapt to different risk levels and industries. Isn’t it better when your tools help you quickly identify threats without extra fuss? That’s what makes a heat map truly effective.
Are There Free Compliance Risk Heat Map Templates Available?
You’re wondering if free compliance risk heat map templates are out there. I’ve found several good options online that are free to download and customize. These templates often include essential features like risk levels, categories, and visual indicators, making your job easier. Just be sure to check their compatibility with your software and whether they offer enough flexibility for your specific compliance needs.
How Often Should a Compliance Risk Heat Map Be Updated?
While it might seem like a simple task, updating a compliance risk heat map isn’t a one-and-done deal. I recommend reviewing it quarterly to stay ahead of emerging risks and changing regulations. Sometimes, unexpected events or audits require immediate updates. Regular updates help me maintain an accurate picture of my organization’s compliance landscape, ensuring I can respond swiftly and effectively. Staying proactive keeps risks manageable and compliance strong.
Conclusion
So, choosing the right compliance risk heat map template is like picking the perfect tool for a job—it makes everything smoother and more manageable. With the right template, you’ll see risks clearly, like a lighthouse guiding you through fog. Remember, the goal is to simplify your risk management process, making it easier to identify and address issues before they escalate. Trust me, the right template can be a game-changer in keeping your operations safe and compliant.